

When developing with Dynamics 365 Business Central in teams, you could have in-place different sandbox environments for developing or testing and you can have the needs to deploy extensions to such environments in an automatic way.
With an Azure-hosted D365BC sandbox (hosted on an Azure VM with a Docker container) you can publish extensions (.app files) also by using Powershell remotely (from your client machine to the Azure VM sandbox).
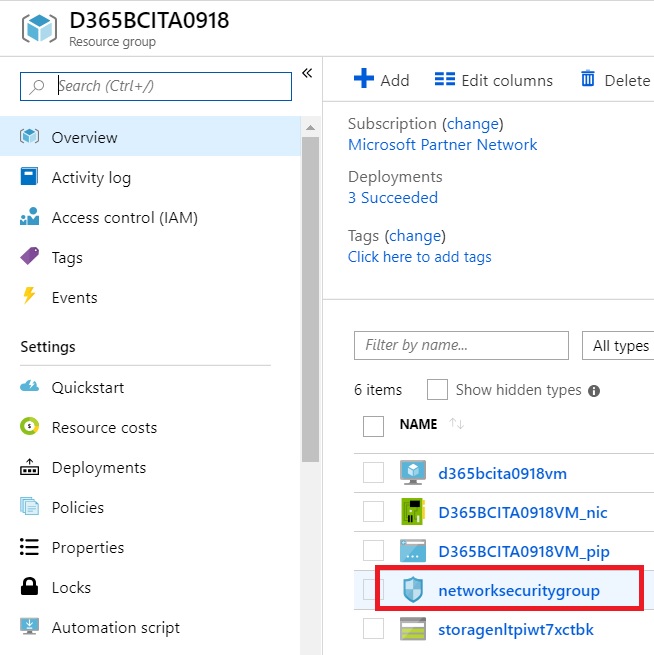
To do that, from the Azure Portal select the Resource Group of your Azure VM that hosts your Dynamics 365 Business Central sandbox and then select the Network Security Group:
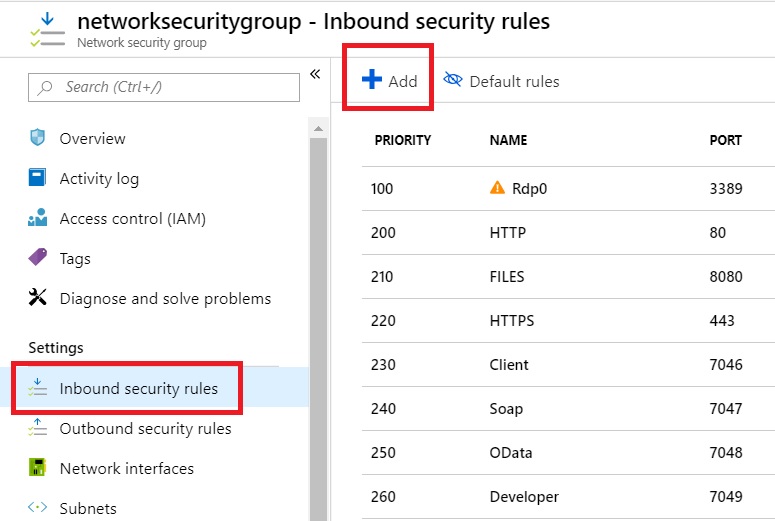
In the Network Security Group blade, click on Inbound Security Rules and then Add a new security rule to enable the Windows Remote Management (WinRM) service:
The rule must be as follows:
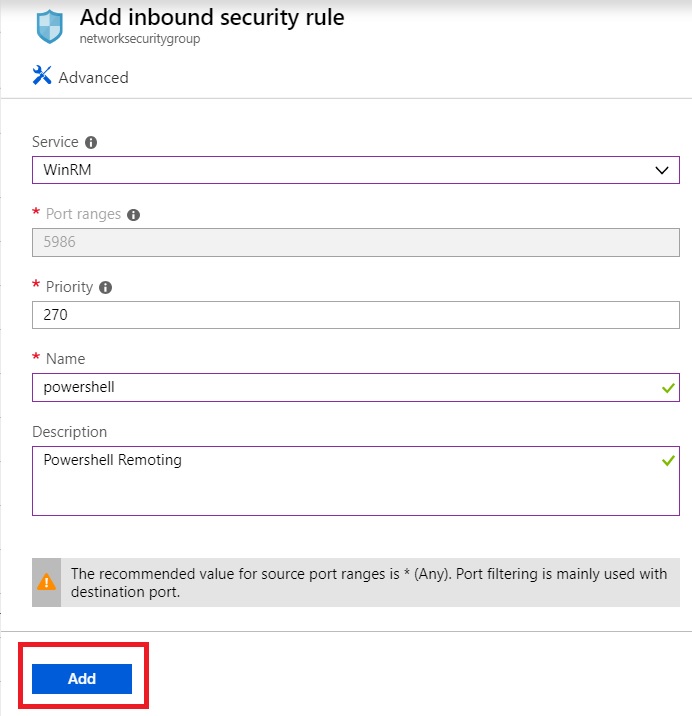
Click Add to create the security rule.
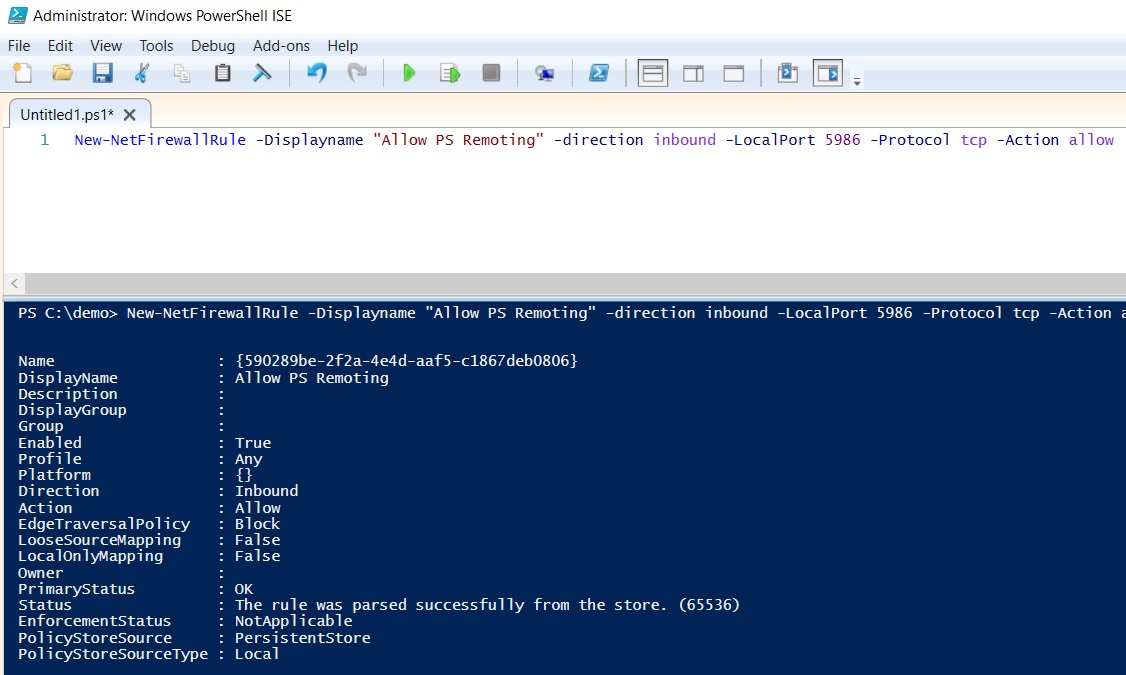
Now connect to your Azure VM via RDP, run Powershell (or Powershell ISE) as admin and execute the following command:
New-NetFirewallRule -Displayname "Allow PS Remoting" -direction inbound -LocalPort 5986 -Protocol tcp -Action allow
This command will add a new firewall rule on the VM for Powershell remoting (it allows inbound connections to port 5986):
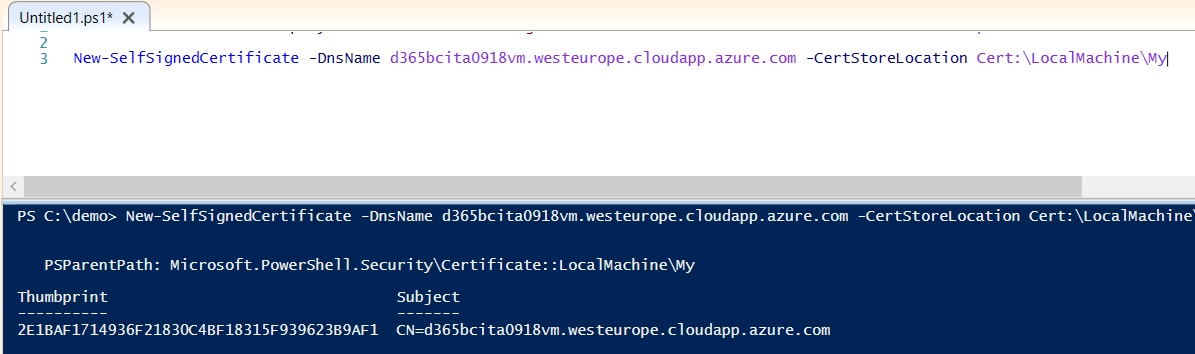
Now we need to create a self-signed certificate for the connection and for this task we can use this command (that creates a certificate to the personal store on the local machine):
New-SelfSignedCertificate -DnsName d365bcita0918vm.westeurope.cloudapp.azure.com -CertStoreLocation Cert:\LocalMachine\My
The output of this cmdlet gives us a thumbprint of a SSL certificate. Copy it to your clipboard (we’ll use it in the next command):
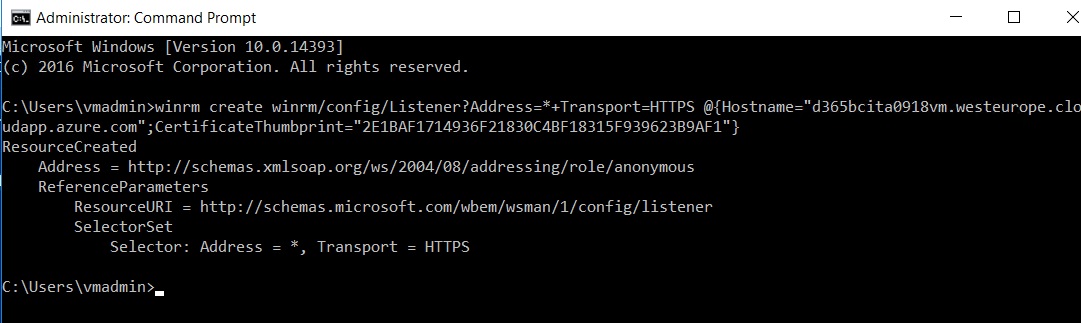
Now always on the Azure VM we need to open a Command Prompt as admin and we need to configure WinRM to listen on port 5986. The command to execute is the following:
winrm create winrm/config/Listener?Address=*+Transport=HTTPS @{Hostname="d365bcita0918vm.westeurope.cloudapp.azure.com";CertificateThumbprint="2E1BAF1714936F21830C4BF18315F939623B9AF1"}
and this is the output:
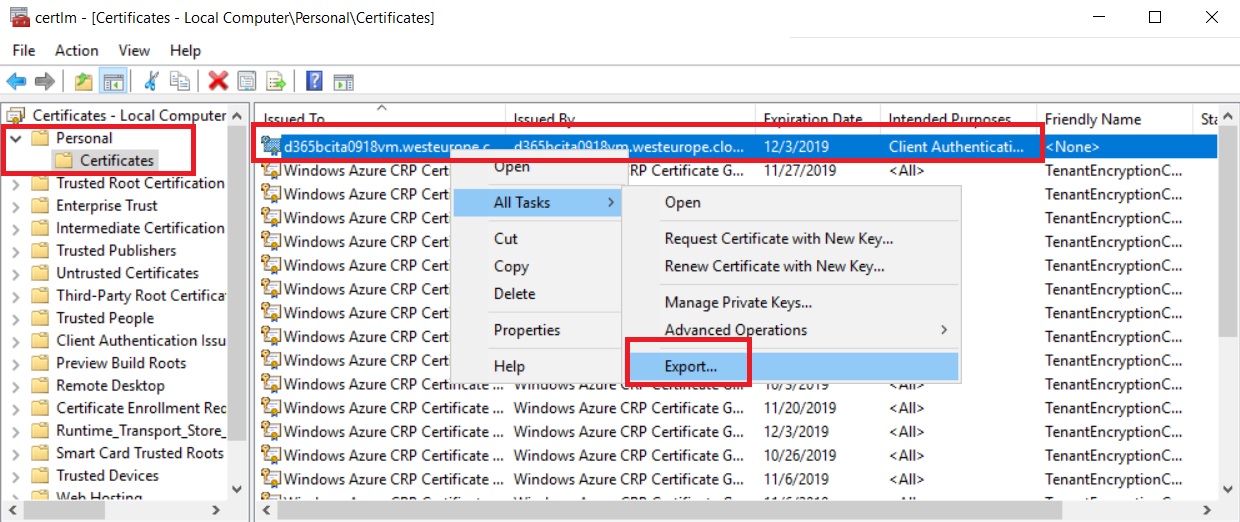
Now we need to export the self-signed certificate from our Azure VM:
During export, select to not export the private key:
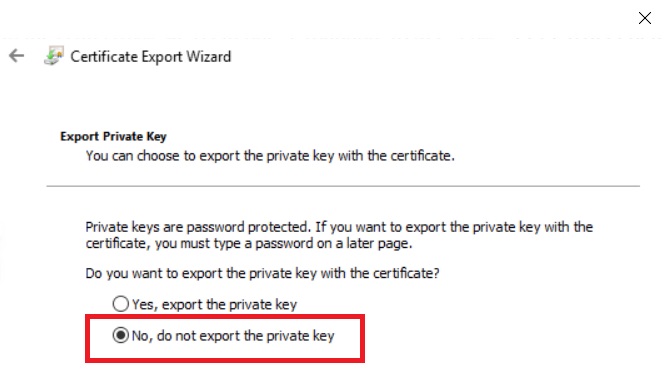
Click Next, leave the default value (DER encoded binary X.509) and save the certificate.
Now we need to copy this certificate to our local client machine, right-click on it and install it under Trusted Root Certificates Authorities. Answer YES to the confirmation dialog.
When the certificate is installed, we’re ready to remotely connect via Powershell to our Azure VM.
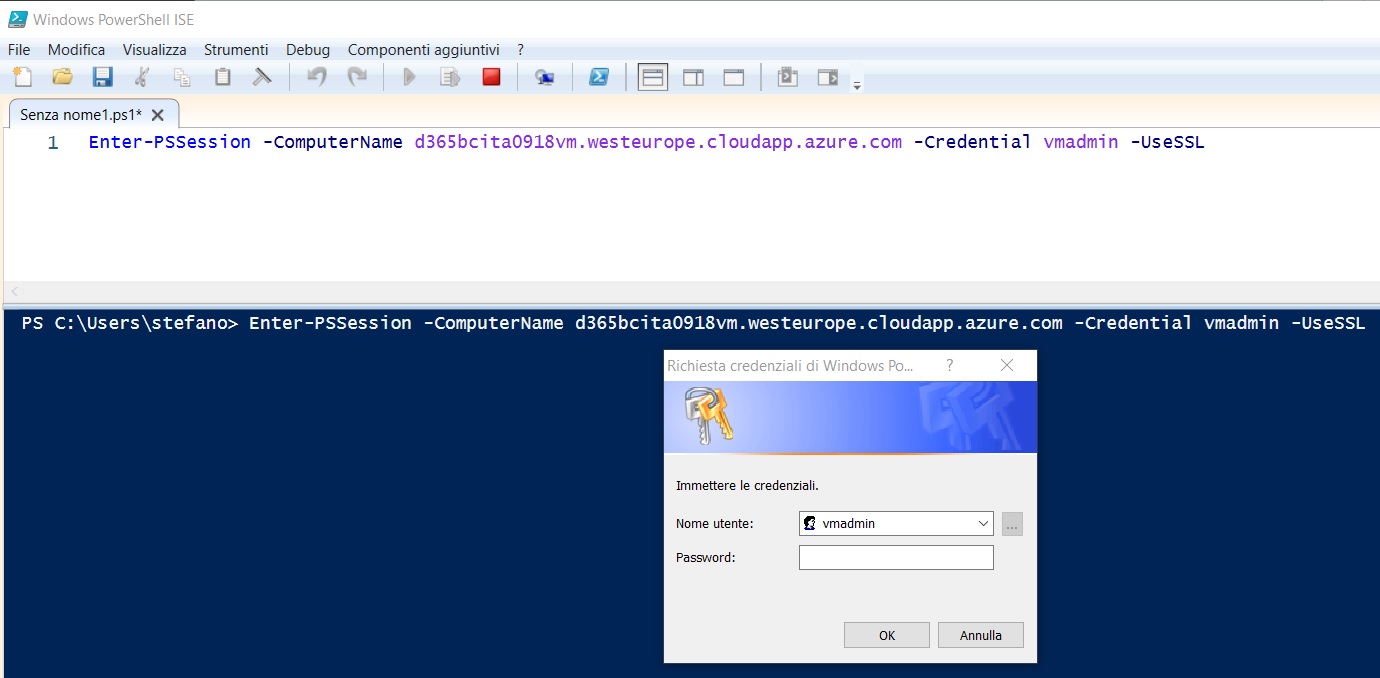
Open Powershell ISE from your local machine and enter the following command:
Enter-PSSession -ComputerName d365bcita0918vm.westeurope.cloudapp.azure.com -Credential vmadmin -UseSSL
You will be prompted to enter credentials for your VM user:
Enter your Azure VM credentials and you will be remotely connected to your VM via Powershell:
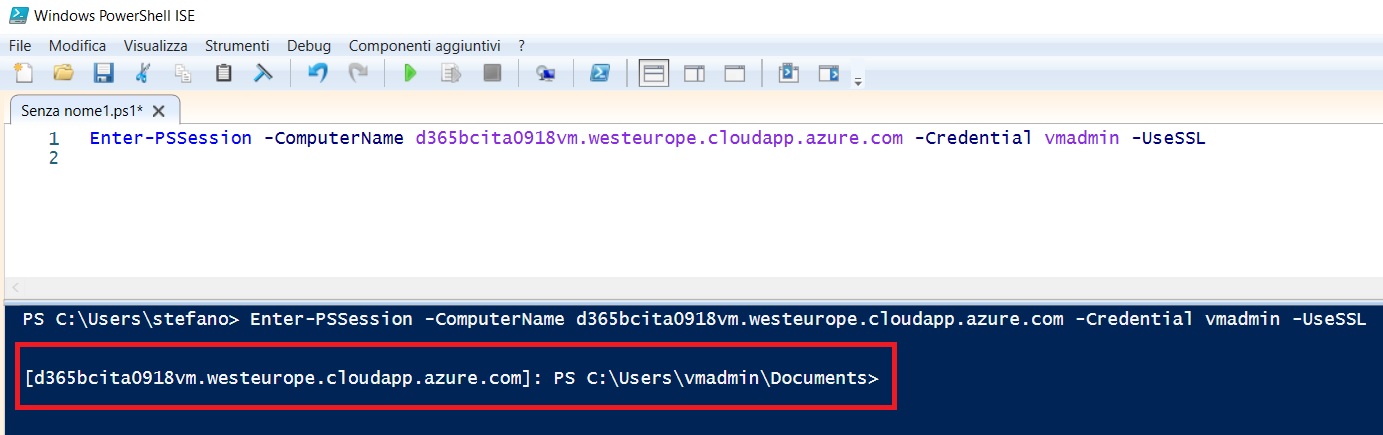
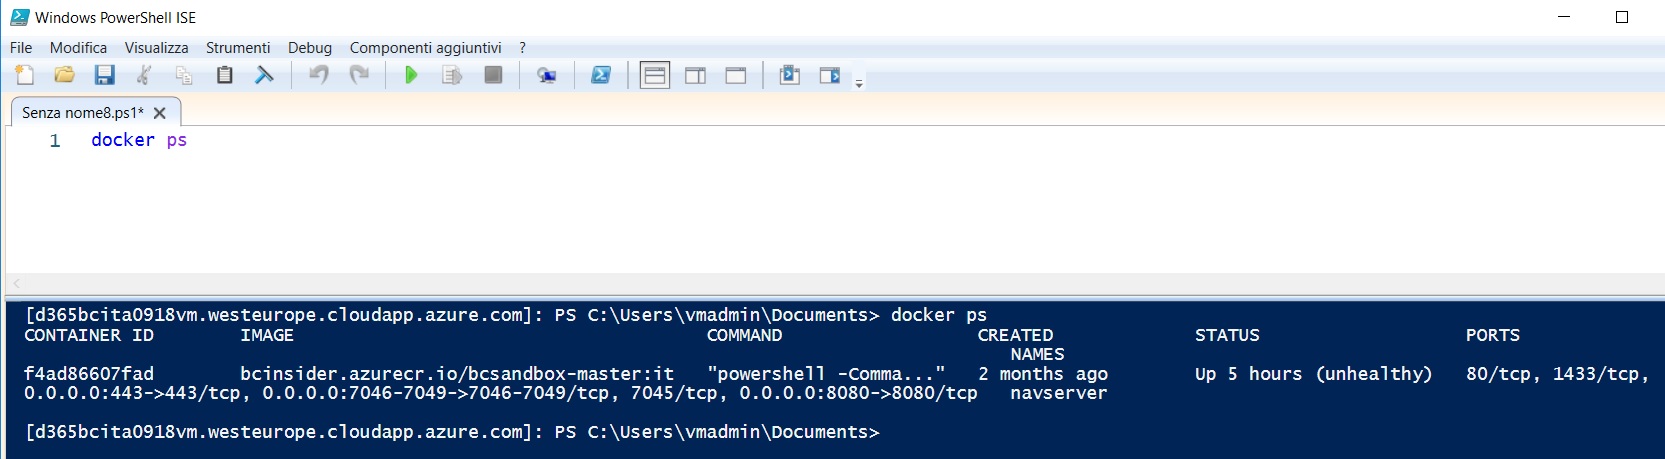
Now you can execute Powershell commands from your local machine and these commands will be run in the remote Powershell session (alias on your Azure-hosted Dynamics 365 Business Central sandbox). For example, here the list of running containers on that Azure VM:
and here we publish an app to the sandbox container:

All is performed from our local machine.
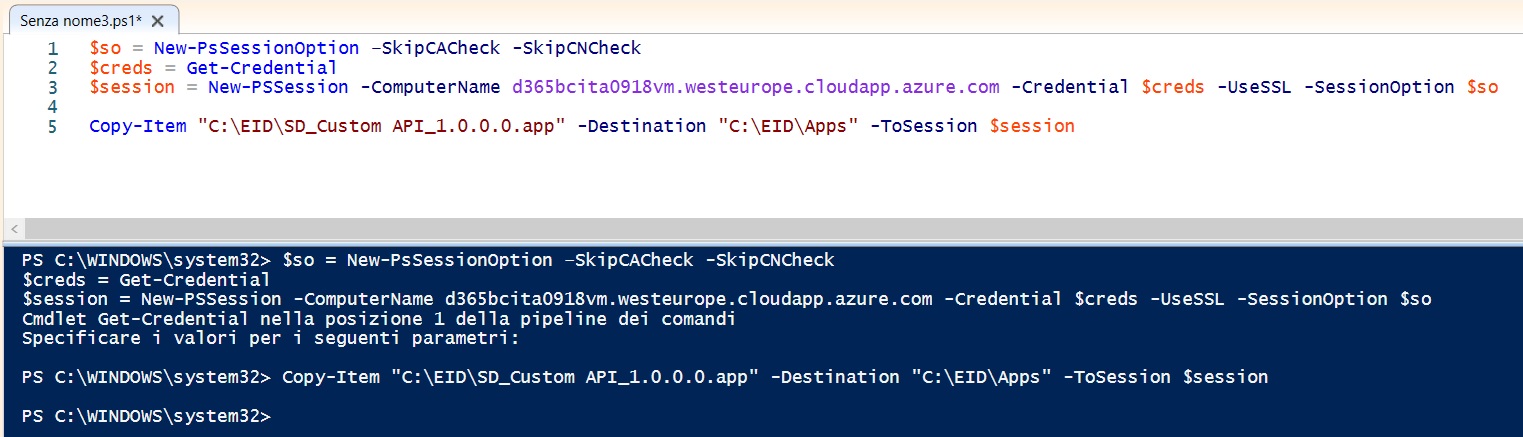
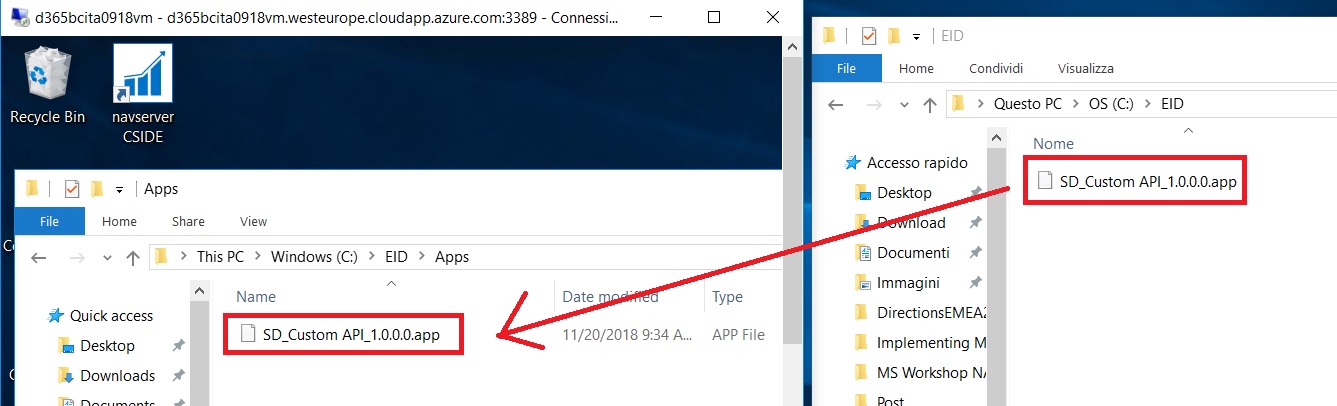
Last example (one of the most useful for my tasks): to copy a local file (for example a .app file that we want to massively deploy remotely to all our Azure VMs) to the remote VM (D365BC sandbox), we can execute the following command:
$so = New-PsSessionOption –SkipCACheck -SkipCNCheck
$creds = Get-Credential
$session = New-PSSession -ComputerName d365bcita0918vm.westeurope.cloudapp.azure.com -Credential $creds -UseSSL -SessionOption $so

Copy-Item "C:\EID\SD_Custom API_1.0.0.0.app" -Destination "C:\EID\Apps" -ToSession $session
This is the ouput:
As a final result, our local file is copied from the target folder (here is C:\EID\SD_Custom API_1.0.0.0.app) to the destination folder in the Azure VM (here is C:\EID\Apps):
This speeds up many testing and deployment tasks.
